Multi-factor Authentication
Purpose of this User Guide
This guide is intended to aid and serve as a how-to for all users as they enroll in Multi-Factor Authentication (MFA). The Dallas College implementation of MFA is implemented for nonstudent accounts only.
Tools and Terms
Multi-Factor Authentication (MFA)
Multi-Factor Authentication (MFA), also known as 2-Step Authentication, is a Microsoft delivered feature which allows an enrolled user to better protect their account by requiring additional steps when signing in. By setting up multi-factor authentication, you add an extra layer of security to your Office 365 account. The first step is to sign in with your password and a code is automatically sent to your phone.
When you sign in from outside the Dallas College Administrative network or Secure Wireless Network, you will be prompted for a code or an authorization from the Microsoft Authenticator App.
It is strongly recommended to set up more than one verification method. For example, if you travel a lot, consider setting up the Microsoft Authenticator for your verification method. It is an easy to use verification method that does not result in any text or call related charges.
Microsoft Authenticator App
The Microsoft Authenticator app installation is required before beginning the mobile device MFA client setup. The Microsoft Authenticator App is available for mobile devices on these operating systems: Android, iOS, and Windows.
Enrolling in Multi-Factor Authentication (MFA)
Accessing Multi-Factor Authentication Enrollment
Once it is enabled, you can proactively set-up up Multi-Factor Authentication on your account by accessing https://aka.ms/MFASetup.
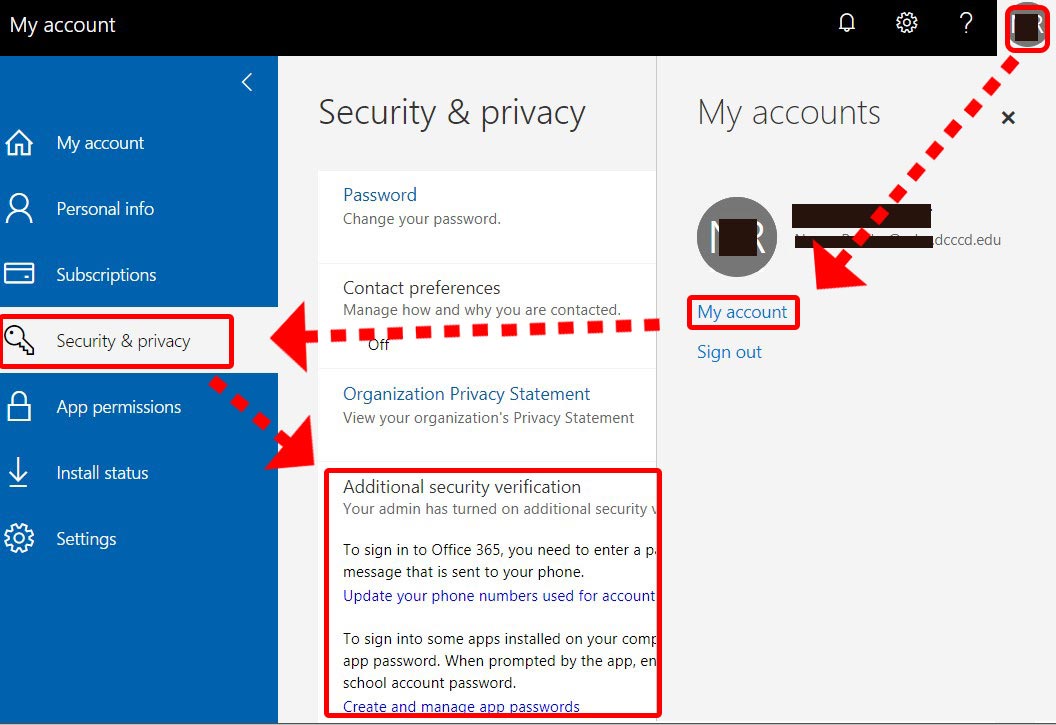
Additionally, you can access Multi-Factor Authentication for further configuration in your Office 365 My Account. After signing in to any Office 365 application in a browser, select Additional security verification under Security and Privacy. Your settings can be found by clicking on your image icon in the upper right and selecting My Account > Security & Privacy > Additional security verification.
Otherwise, you will be prompted to enroll in MFA the first time you sign in from outside the Dallas College Administrative network.
Once multi-factor authentication, also called 2-step verification, is enabled, you must set up your account to use it.
- Sign in to Office 365, as you normally would, with your work or school account using your password. After you choose Sign in, you will see the following page:
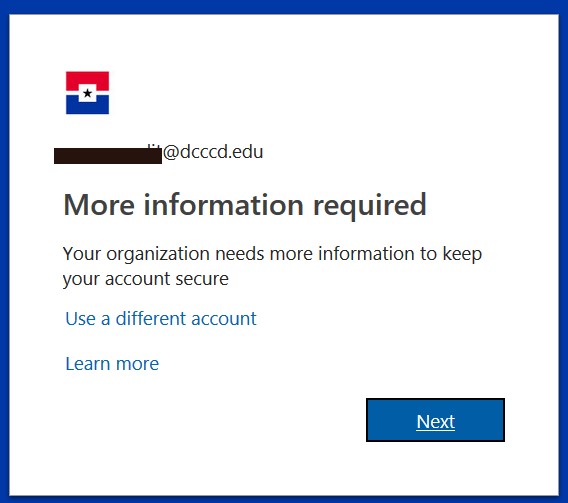
- Choose the Next button to proceed.
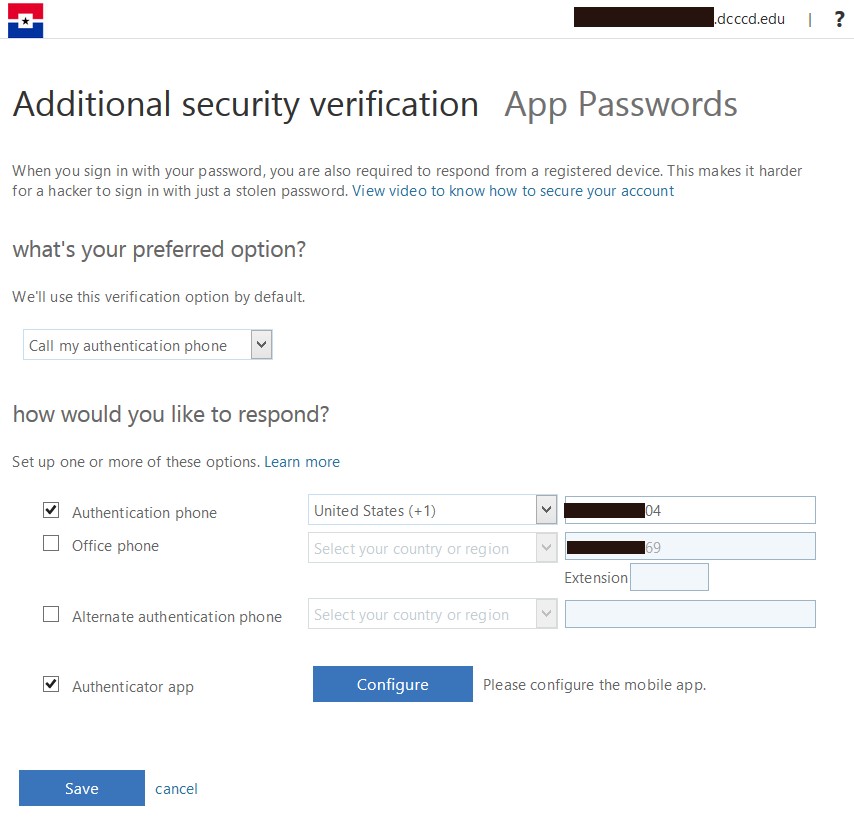
- Select your authentication method and follow the prompts on the page. You can watch the video provided to learn more.
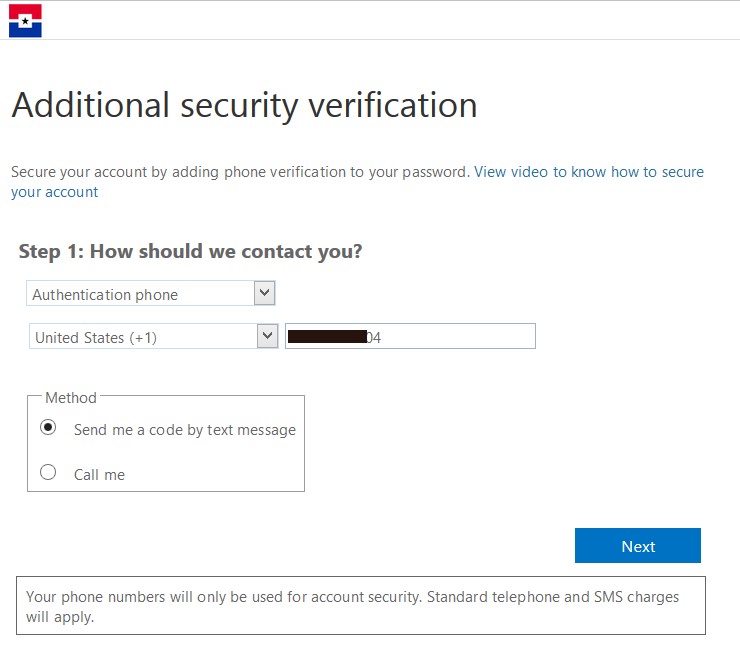
- Verifying Alternate Phone (verification via text message method illustrated)
4.1. Enter your country code and phone number.
4.2. Choose Send me a code by text message or Call Me.
4.3. Choose the Next button.
- Verifying Alternate Phone
5.1. Enter the code received in the text message.
5.2. Choose the Verify button.
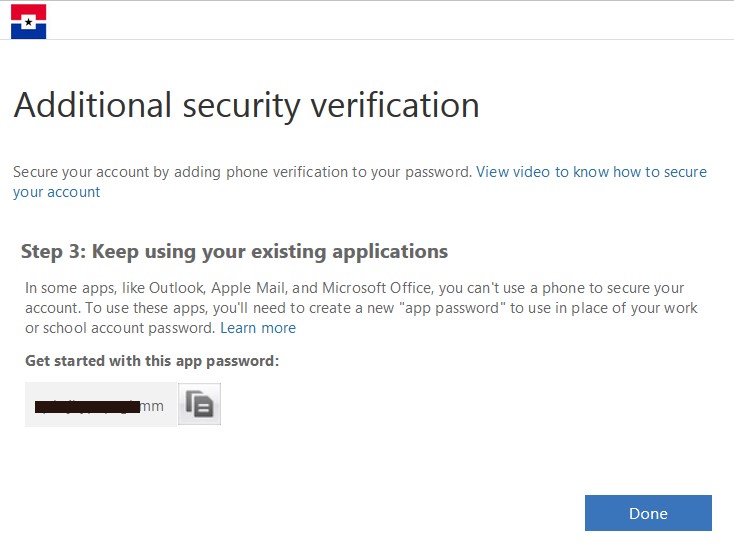
Note: If you choose Call Me as the method, answer the phone and follow the on screen and phone prompts (typically this is choosing Verify now on the screen and pressing # on the phone). - Getting an App Password
6.1. You will receive an app password that you can use with Outlook, Apple Mail, or other email service providers. Choose the copy icon to copy the password to your clipboard. You won't need to memorize this password. If you save this password, keep in a secure place as it can be used to bypass your password and MFA.
6.2. Choose the Done button to move on with the remaining set-up.
- Once you complete the instructions, you need to specify how you want to receive your verification code. The next time you sign in to Office 365, you will be prompted to enter the code that is sent to you by text message or phone call. When you sign in from outside the Dallas College Administrative network, you will be prompted for a code or an authorization from the Microsoft Authenticator App. It is strongly recommended to set up more than one verification method. For example, if you travel a lot, consider setting up the Microsoft Authenticator for your verification method. It is an easy to use verification method that does not result in any text or call related charges.

Setting up Microsoft Authenticator App
- Install the Microsoft authenticator app for Windows Phone, Android or iOS on your phone.
- In the app, add an account and choose Work or school account.
- Enable the Authenticator app checkbox in the Office 365 Additional security verification screen.
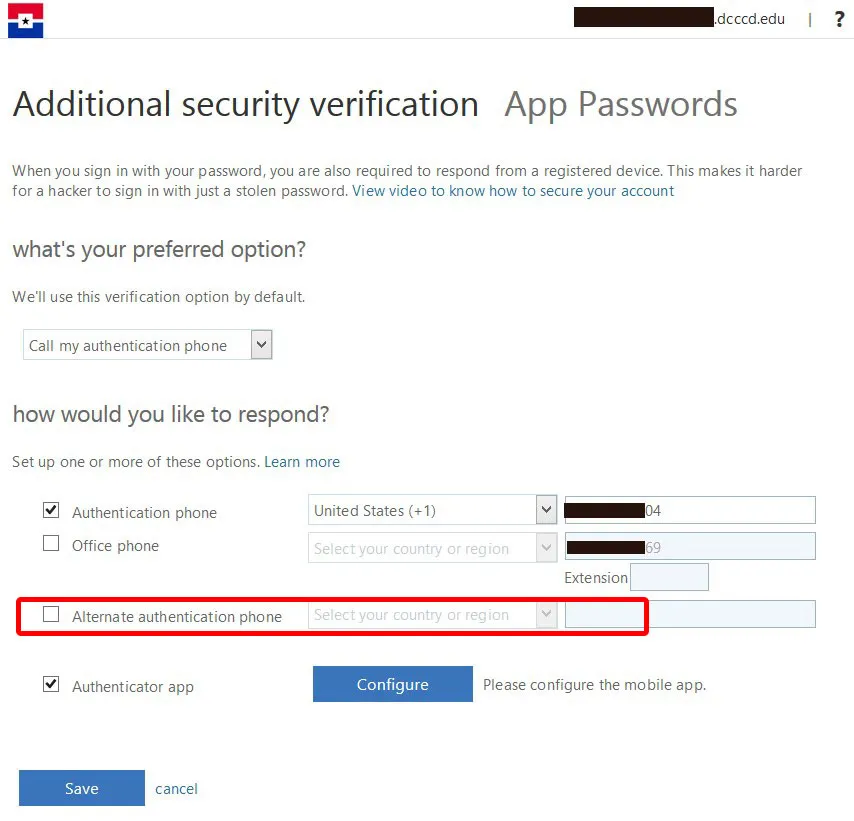
- Choose the Configure button.
- This will show you the Configure mobile app screen.
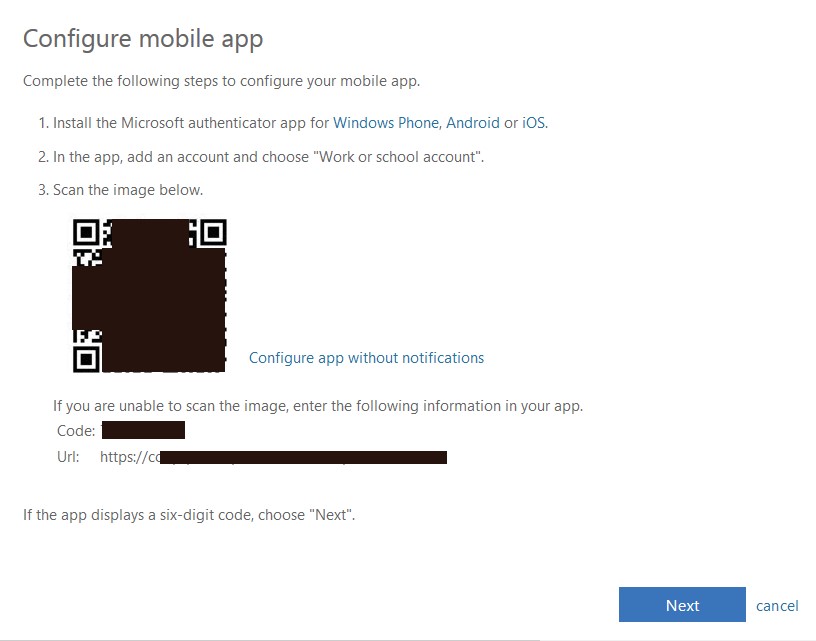
- Use your phone or mobile device to scan the 3-D barcode image in the Configure mobile app window.
- If prompted, configure the app on the phone without notifications.
- If the app displays a six-digit code, choose Next.
- Choose Next in the Configuration mobile app window to verify your configuration.
- This will return you to Office 365 Additional security verification screen.
- Choose your preferred option.
Note: If the mobile app is installed: it is recommended to make this your default option. - Choose the Save button.
Configuring an App Password in Outlook
To access Outlook from a phone or computing device outside of the Dallas College Administrative network, you will need to perform these additional steps.
Do not set-up an App password on a shared computing device.
- Open Outlook, such as Outlook 2010, 2013, or 2016.
- Whenever you're prompted for your password, paste the app password in the box. For example, if you've already added your account to Outlook, paste the app password on the login screen:
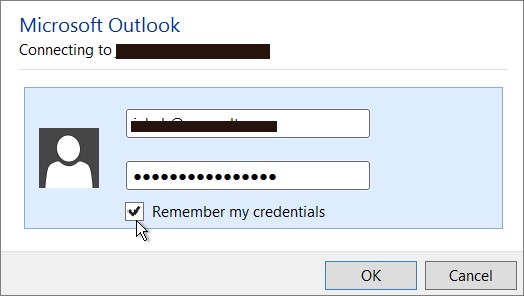
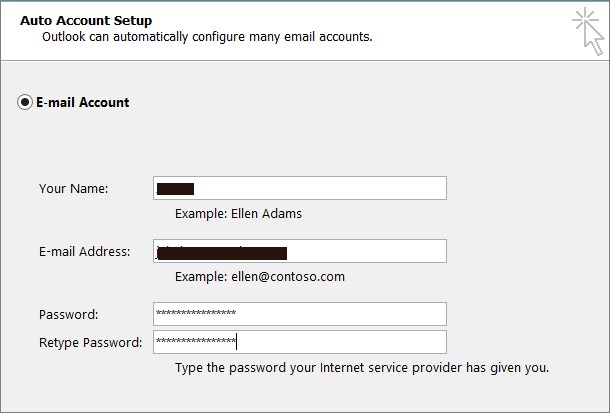
- Or, if you're adding your Office 365 account to Outlook, enter your app password Auto Account Setup screen:
- Restart Outlook.
Managing App Passwords
Things to Know about App Passwords
- You should create a separate App password for each device that uses one.
- Once an App Password is created, there is no way to go back and get its value. You must create a new App password and delete the old one.
- If an account becomes compromised, it is a standard operating procedure to clear all App passwords.
- Never install an app password on a device you do not have complete control over.
- If exposed, App Passwords are dangerous as they bypass the account password and MFA. Keep them in a safe place until you have them safely configured in the device.
Where to Manage App Passwords
App passwords can be managed on the Additional security verification screen by selecting the App password link at the top.
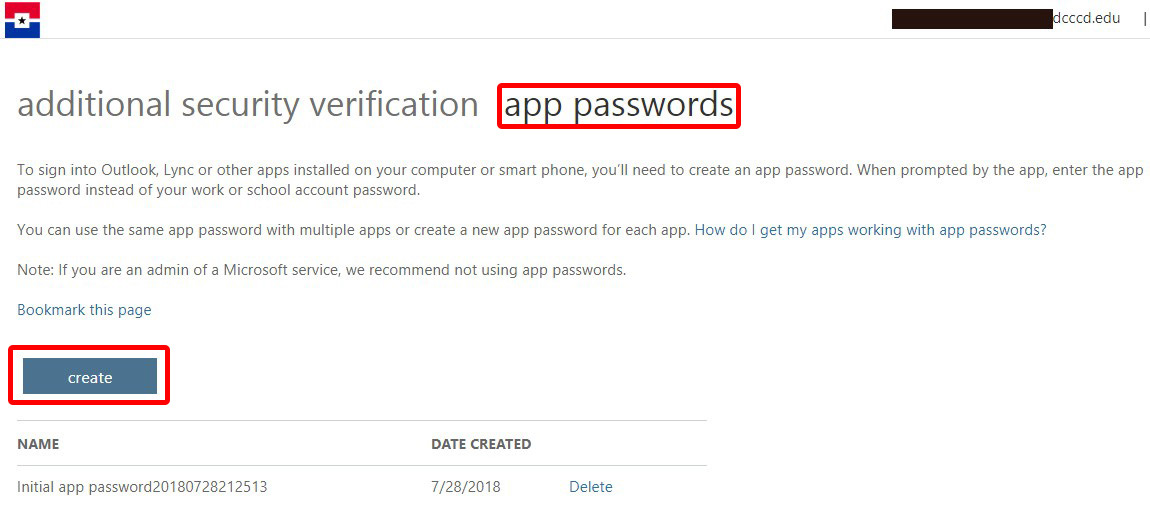
Creating a New App Password
- Choose the Create button.
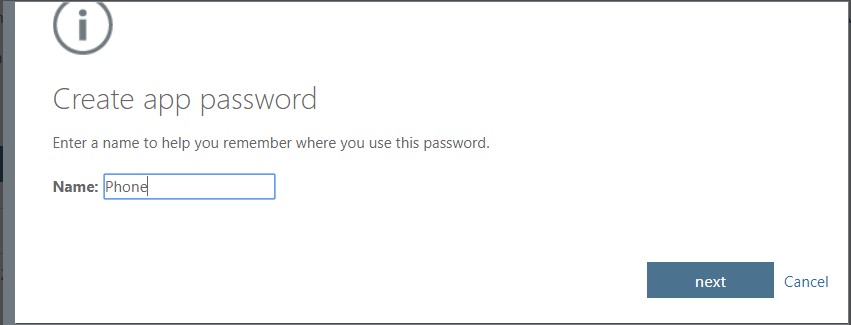
- Give the App Password a name that references the device for which it will be used.
- Choose the next button.
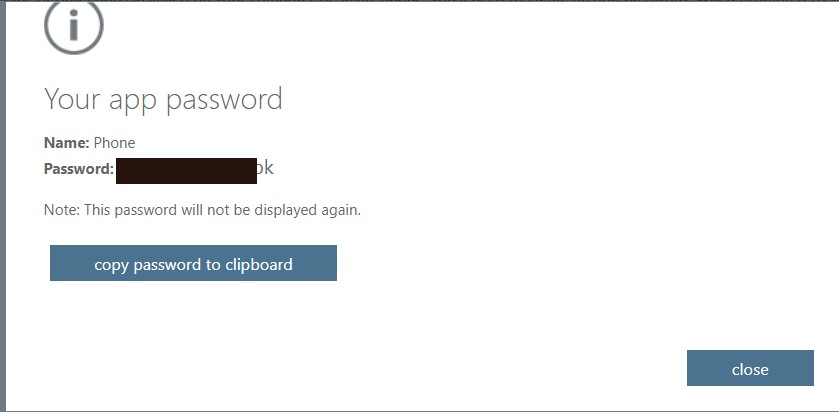
- Copy the App password to the clipboard for use when configuring your device.
- Close the window.
Note: Once you close this window, you cannot return and get the App Password value. Please make sure you have the App Password value secured in a safe place.
Tips and Frequently Asked Questions
See the Video on Multi-Factor Authentication (MFA)
Official Microsoft Trouble Shooting Tips for MFA
Set up 2-step verification for Office 365
Questions about this document
If you have any questions regarding this user guide, please contact IT Operations and Support Services, via email, at DocumentCenter@DallasCollege.edu.
Download the Printable Multi-Factor Authentication MFA Enrollment Guide (PDF - 881KB)