Navigate Student Desktop App Quick Guide: Planner
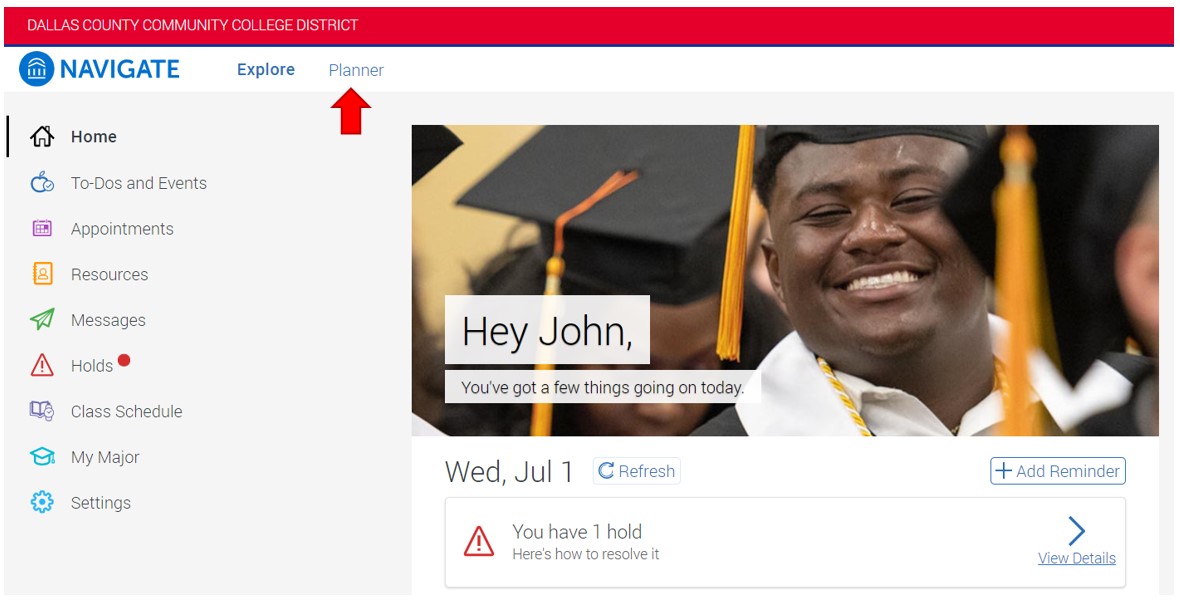
1. Click the Planner tab, located near the top middle of the page.
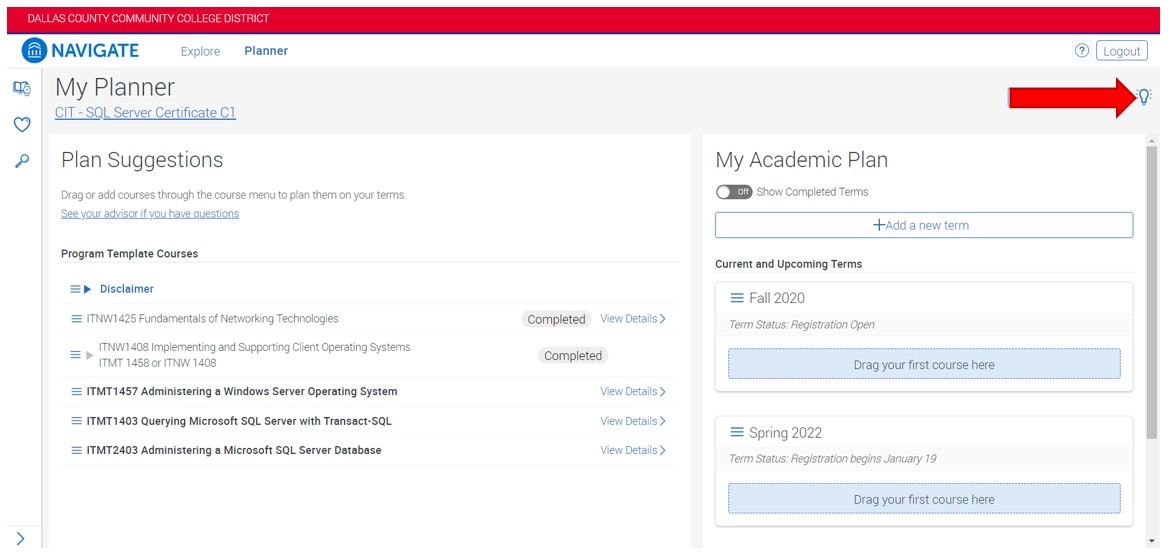
2. At the top right corner of the screen is a link to provide feedback, to print and a lightbulb icon to provide a brief tour of the Planner tool.
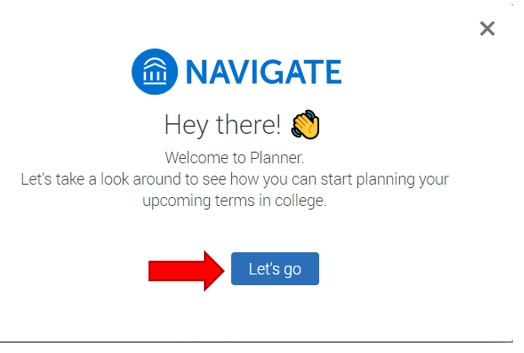
3. The first pop-up message is a welcome message. Click the button Let’s go to continue.
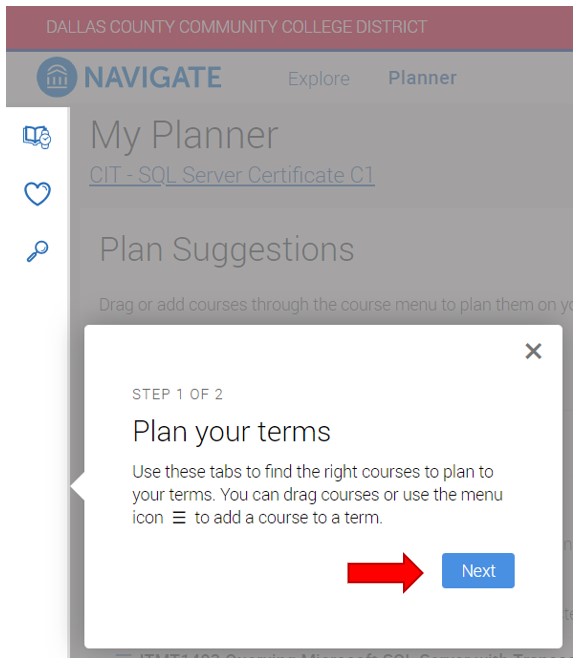
4. The second pop-up message briefly describes planning terms by using the course search tools on the left side of the screen to locate courses, then drag and drop courses into the future terms tool. Click the Next button to continue.
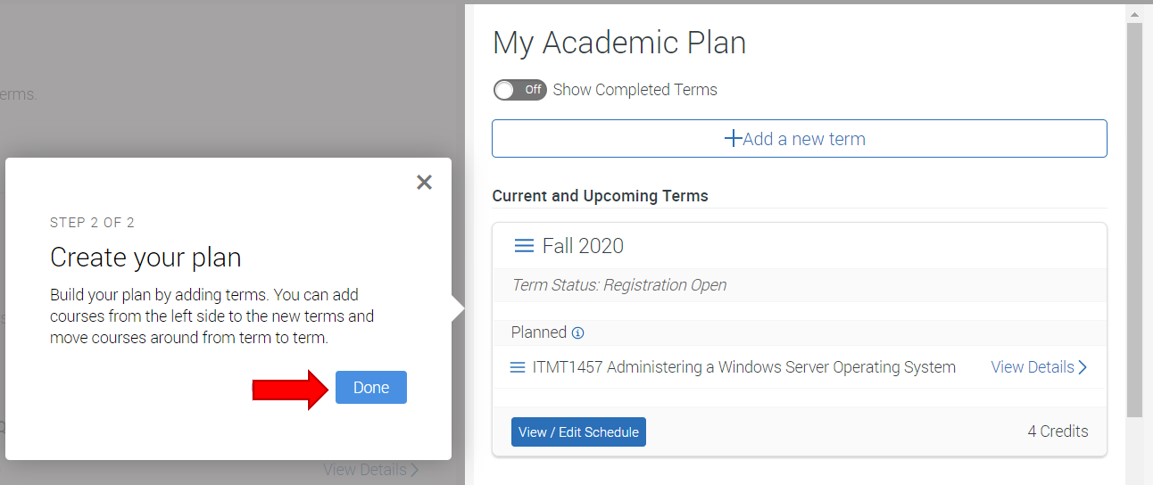
5. The third and last pop-up message briefly describes adding terms on the right side of the screen by clicking the +Add a new term button. Click the Done button to complete the tour.
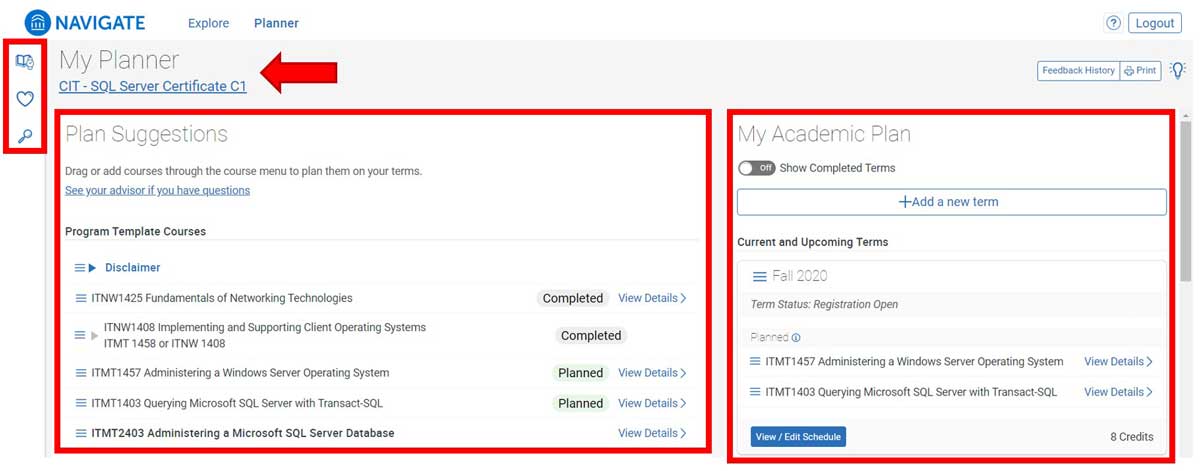
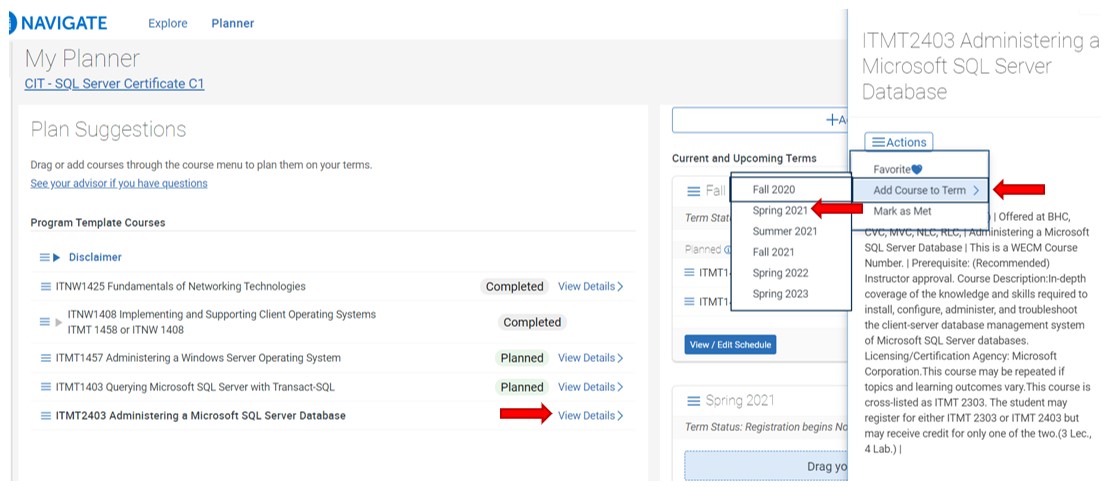
6. Notice My Planner – Plan Suggestions is the default screen for My Plan. Plan Suggestions includes the required classes for the chosen program of study. To the left of Plan Suggestions, there are links to two other screens on this page, Favorites and Search. To the right of Plan Suggestions is the section My Academic Plan allows for planning classes by term.
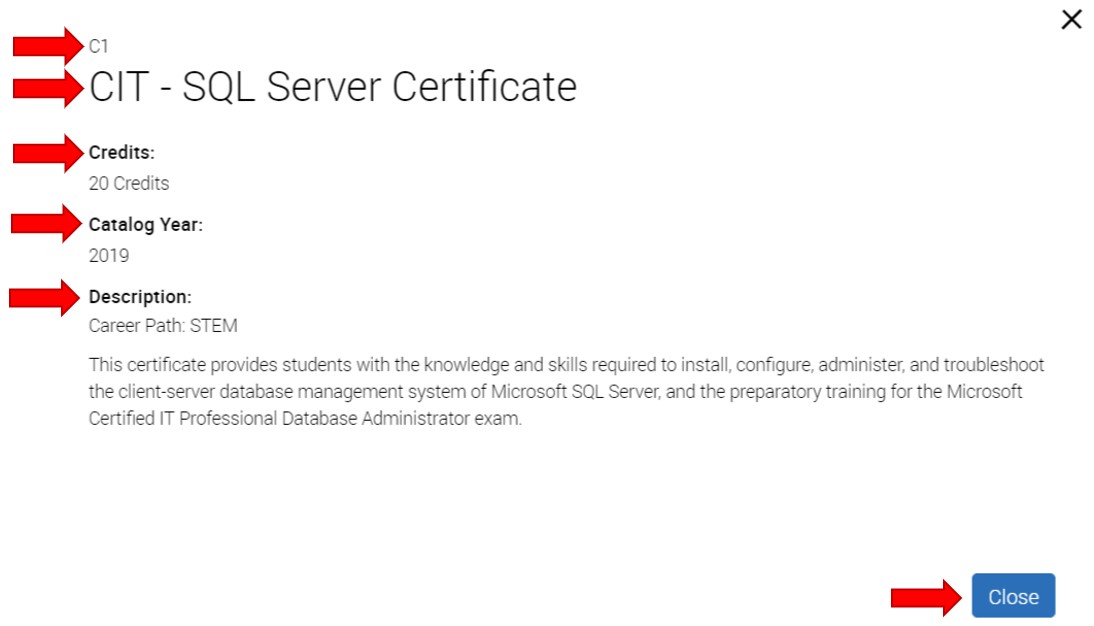
7. Directly under My Planner, click the program of study hyperlink to review a pop-out box providing a brief description of the credential details.
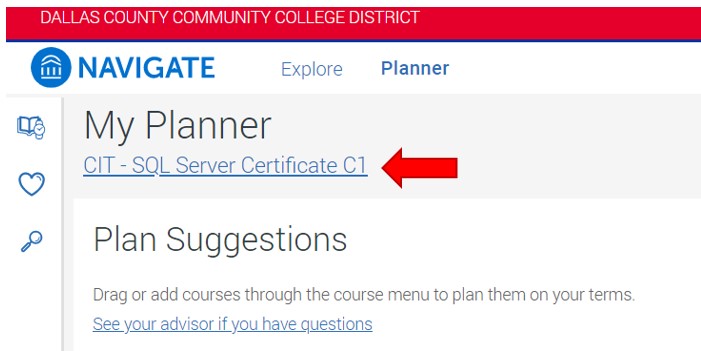
8. Details include: Credential type (C1 – Level one certificate), Credential title (CIT – SQL Server Certificate), Credit hours required for completion (20 credits), Catalog Year (2019), and Description of career path (STEM Career Path and a brief description of knowledge and skills required for this career). Select the button Close.
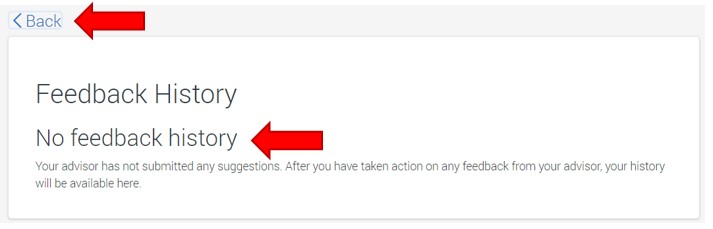
9. To read feedback from the academic advisor, near the top right corner of the screen, click Feedback History.

10. Notice in this example there is no feedback history. To return to the previous screen, Click Back.
11. To print a copy of My Planner, near the top right corner of the screen, click on the button Print.

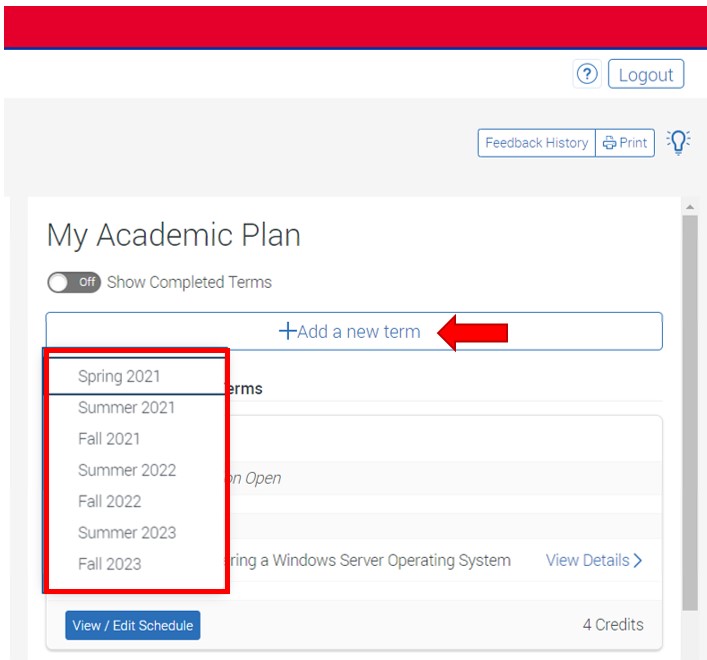
12. Under the section on the right side of the screen titled My Academic Plan, click +Add a new term to plan out classes for future semesters.
13. To plan out classes for future semesters, drag and drop classes from the Plan Suggestions into the future semesters.
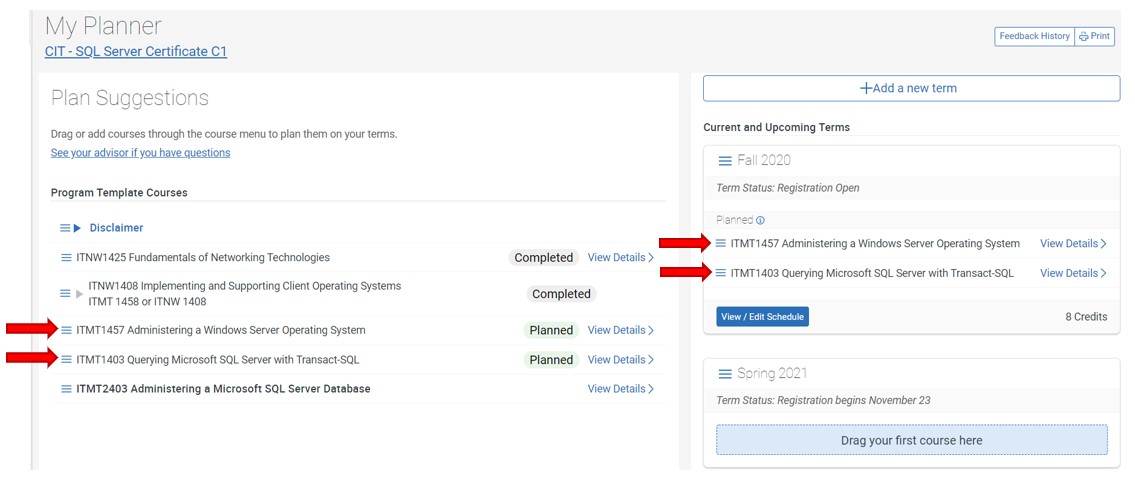
14. Alternately, a student may select the View Details hyperlink, then on Add Course to Term to add classes to the future semester.
15. If the class has been completed at a Transfer School, but the coursework is not yet showing on the student academic plan, the student may mark the course as complete by clicking Mark as Met.
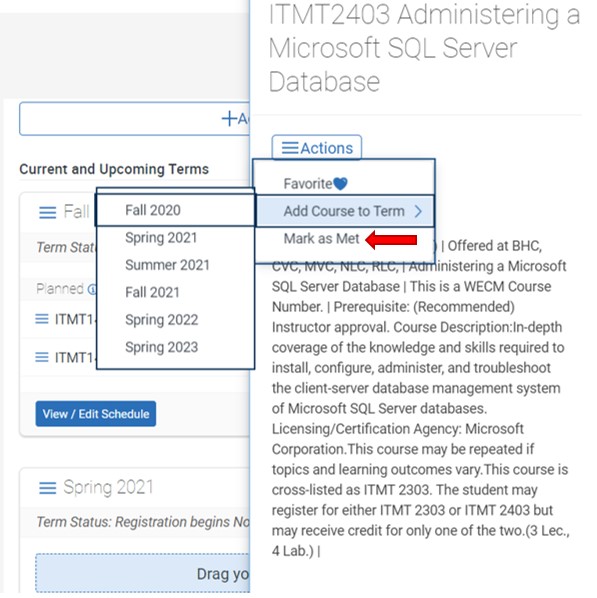
16. A pop-up box will appear for the student to include a comment for the advisor.

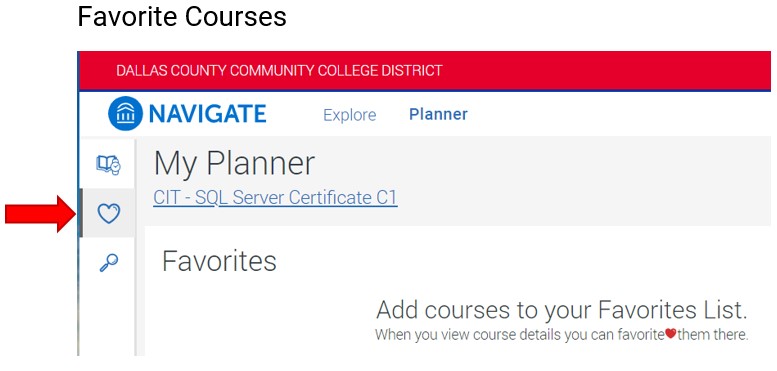
17. On the left menu bar, select the heart icon to review any courses selected as Favorite Courses.
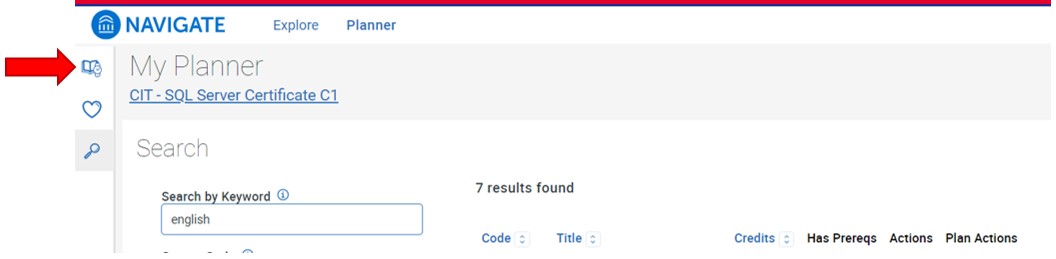
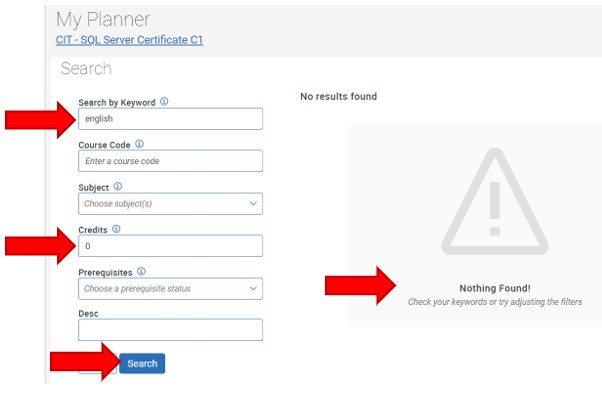
18. Click on the magnifying glass to open the course search section. There are six search textboxes: Search by Keyword, Course Code, Subject, Credits, Prerequisites, Description.
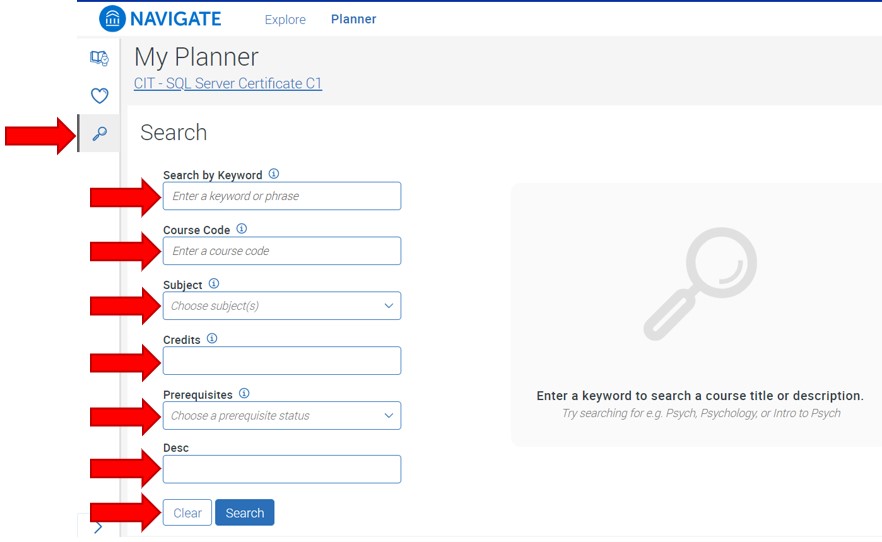
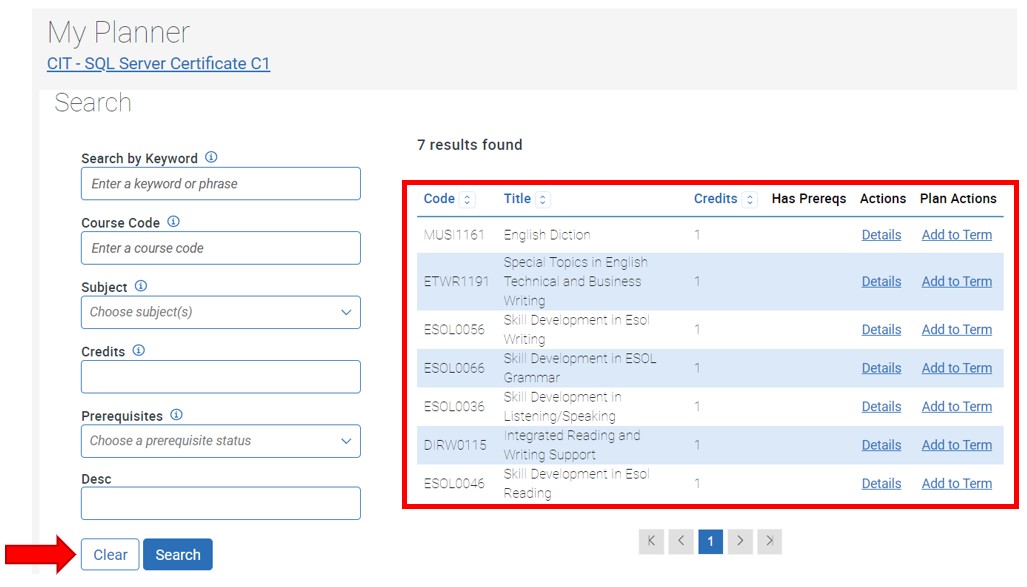
19. Students must be careful when using more than one search box, each search box item chosen is used to limit the search results. Notice in the example below the Keyword Search textbox equals English and the Credits equals 0. There are no search results for this search combination.
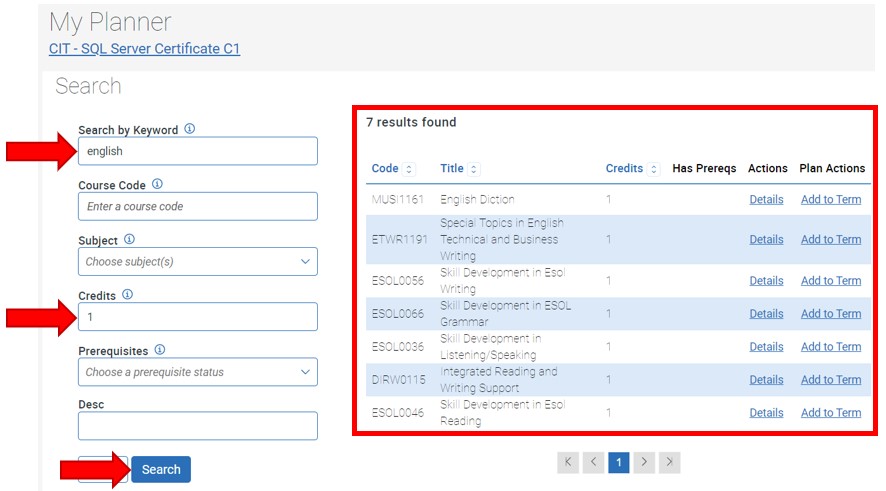
20. Notice in the example below the Keyword Search textbox equals English and the Credits now equals 1. There are seven results for this search combination. Search results are displayed in a table format, with columns (from left to right): Code, Title, Credits, Has Prereqs, Actions and Plan Actions.
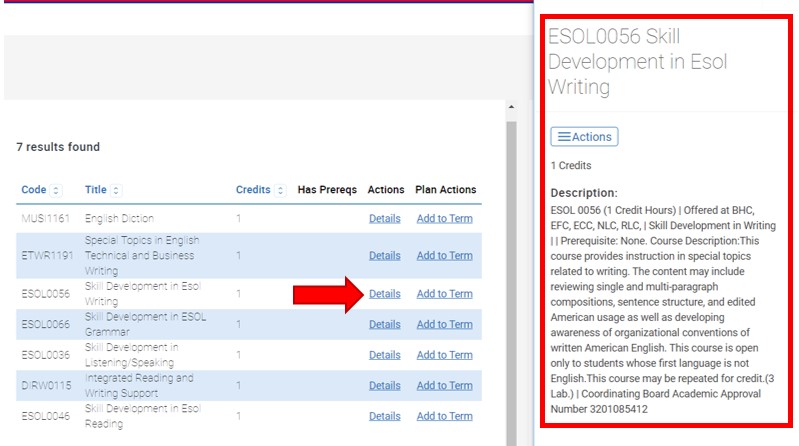
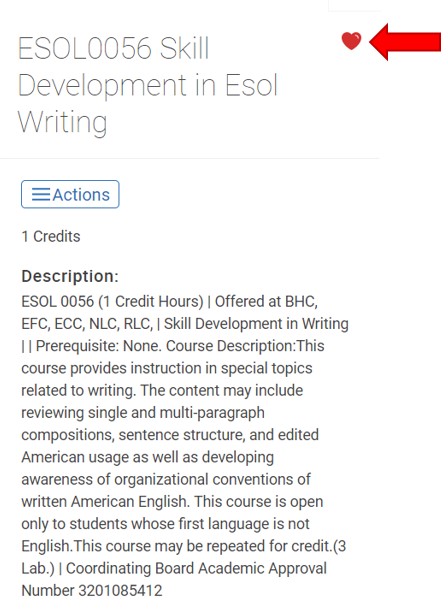
21. Under the Actions column, click on the Details link. The College Catalog Course Description will appear as a pop-up textbox to the far right of the page. Notice the example below shows the course description for ESOL 0056 Skill Development in ESOL Writing.
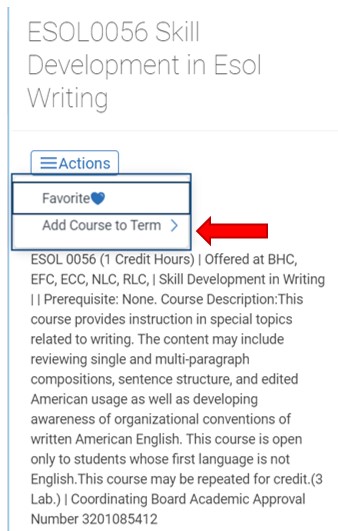
22. Click on the Actions Notice there are two available actions, Favorite and Add Course to Term.
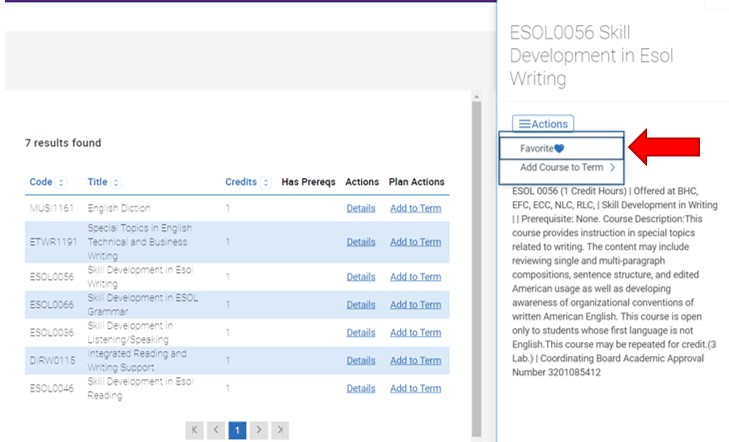
23. Click Favorite to tag this course as a favorite. Notice a heart icon appears to the right of the course code-title.
24. Under the Course Details - Actions menu Click Add Course to Term to add the course to a semester on your academic plan.
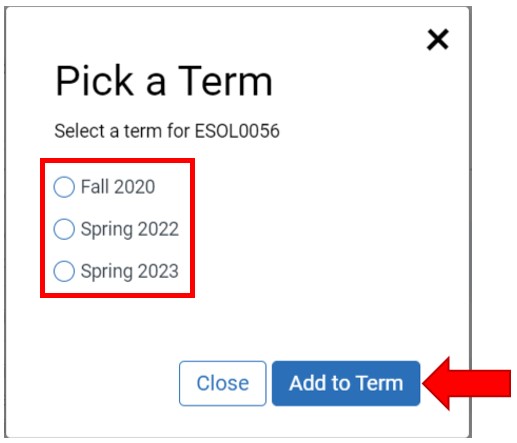
25. A pop-up box will appear with the available semester options. Click the radio button to the left of intended semester, then click the button Add to Term.
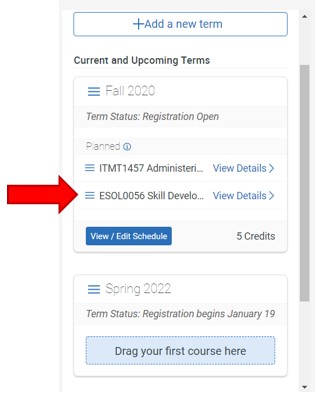
26. Notice the class is updated to the Fall 2020 Academic Plan, located in the far-right column of the search results.
27. Click the Clear button to reset the search criteria. Notice the last search results will remain to the right of the search textboxes until a new search is executed.
28. Click the planner icon (open book) to return to the Academic Plan page.