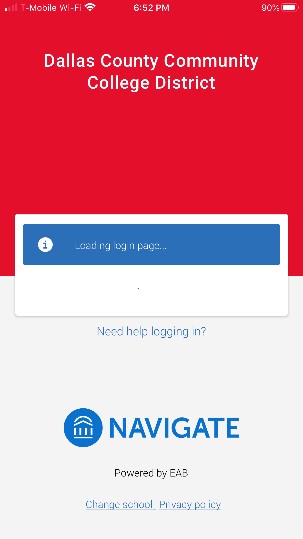
Navigate Student Mobile App Quick Guide: Settings

​​​​​​
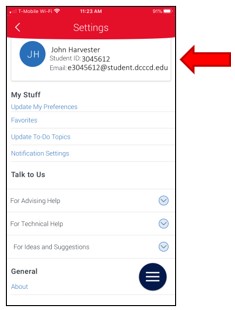
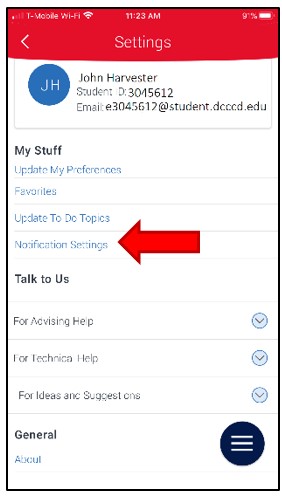
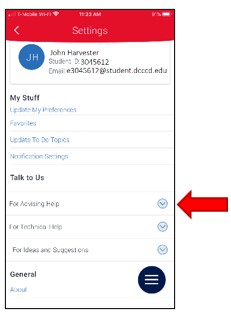
  1. Notice Settings under the Explore menu list. Settings provides confirmation of student name, ID number and school email account. It also contains three different sections: My Stuff, Talk to Us and General.
    Mobile app home page. Under the section Explore, select menu item, Settings. 
    Settings. Confirm student name, ID number and email address at the top. There is list of setting options available under three sections: My Stuff, Talk to Us and General.
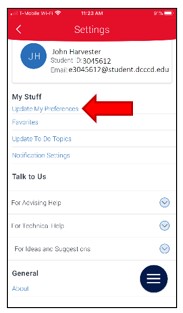
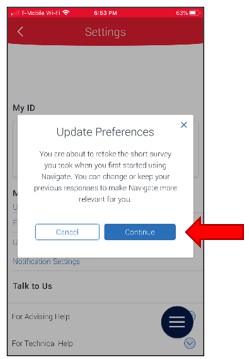
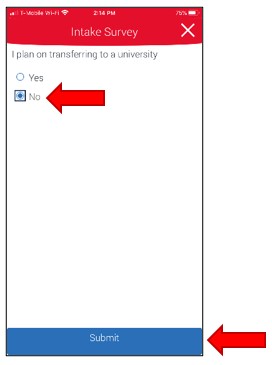
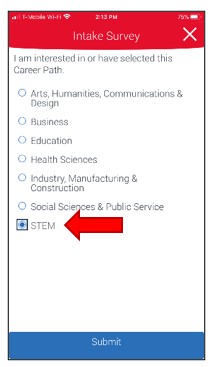
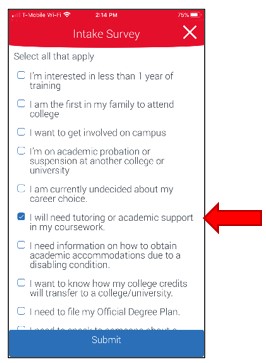
  2. Under the section titled My Stuff, select Update My Preferences to retake the Intake Survey originally completed when activating the user account on the mobile app. The Intake Survey is used to:
    1. Identify your goal after graduation (transfer or employment)
    2. Identify your Guided Pathway to Success
    3. Identify information you want to receive regarding college resources and services
    4. Settings. Select Update My Preferences. 
      A pop-up window with a confirmation message that the student wants to update preferences. There is an option to Cancel and an option to Continue. Select Continue to update preferences on the Intake Survey. 
       
      Preference Question 1. I pan on transferring to a university. Response options are Yes or No. 
      Preference question 2. I am interested in or have this selected Career path. The option for response is to select one of the seven Guided Pathway to Success career paths.

      Preference Question 3. Select all that apply. Response options include a checkbox list of items related to student interests, academic and career goals.
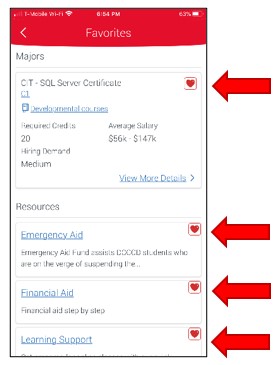
  3. Favorites. Students have the option to mark Majors and Resources with a Favorite status. This allows for quick access to all Favorites in this Settings – Favorites section of the mobile app.
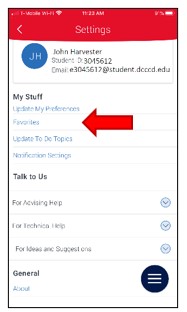
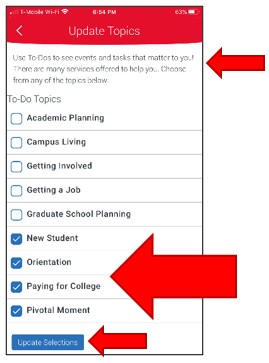
  4. Settings. Select Favorites.
    Favorites. Quick access to Favorite Majors and Resources selected by the student in other sections of the mobile App.

  5. To-Do Topics. Students may opt in or opt out for optional academic and career To-Do Topics. These topics provide reminders for student services available for increased support and student success. Topics include, but are not limited to: Academic Planning, Getting a Job, Orientation, Study Abroad and Transfer Students.
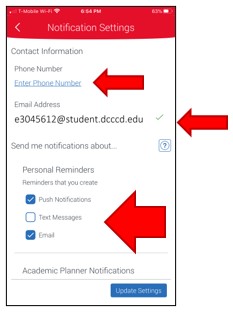
  6. Settings. Select Update To Do Topics. 
    Update Topics. A checkbox list of optional academic and career To Do Topics is available for student opt-in. Select checkboxes to opt-in, unselect checboxes to opt-put. Choose Update Selections. to finalize settings.
  7. Notification Settings. Students may verify their phone number and college email account on this screen. Students also have the option to opt in or opt out for mobile app push notifications, text messages and emails at any time. Notification categories include: Personal Reminders, Academic Planner Notifications and Must-do steps.
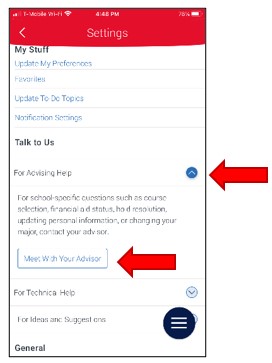
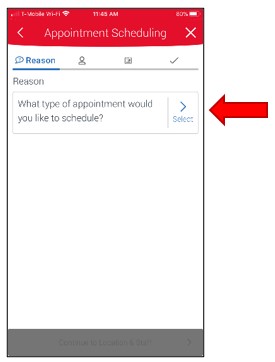
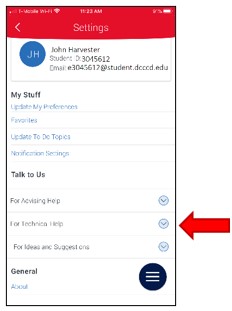
  8. Settings. Under section My Stuff, select  
    Notification Settings. confirm or enter phone number, view college email address, update notification checkboxes (push notification, text message, email) for Personal Reminders, then scroll down to continue.
    Notification Settings Continued. Continue to update notification checkboxes (push notification, text message, email) for Academic Planner and Must do steps.Select Update Settings menu item when complete.
  9. Talk to Us - For Advising Help. Students are directed to schedule an appointment for advising support. The academic advisor is the primary support to assist students understand how to navigate college. This includes understanding policies, procedures, student responsibilities, student rights and all the supports and resources available for student support.
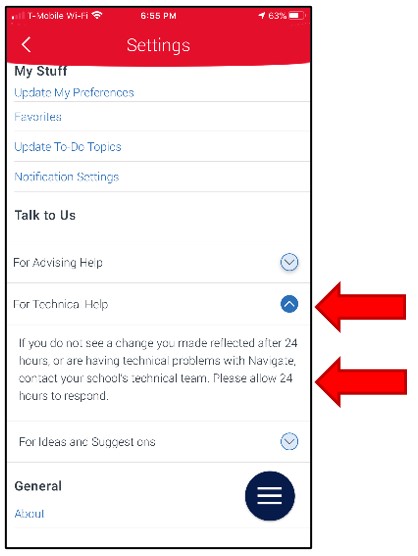
  10. Settings. Under section Talk to Us, Select menu item  
    Advising help. A drop down detail opens to inform students that academic advisors are their primary point of contact for their college career. There is a menu list item to schedule and advising appointment. To continue, select Meet With Your Advisor.

    Appointment Scheduling. Start screen. Choose menu item Select to continue.
  11. Talk to us - Technical Help. There is a 24-hour delay in the Navigate app to update any changes made to student records in eConnect (class add/drop, phone number update, email update, program of study change, etc.). As a result, students should wait 24 hours for any student record changes to update. If updates are not visible after 24 hours, students may contact Student Technical Support for assistance.
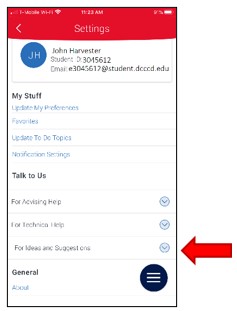
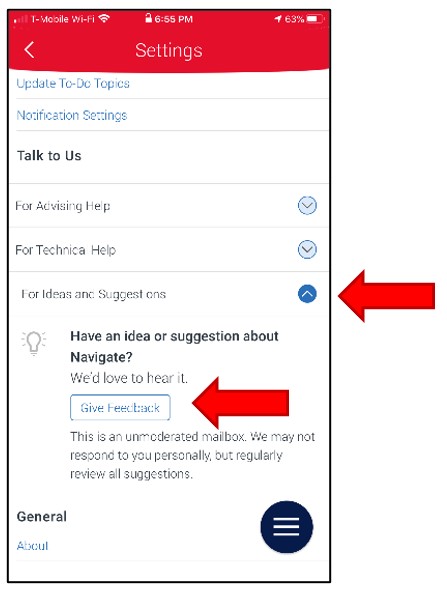
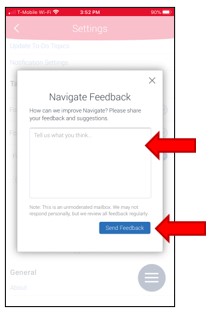
  12. Settings. Under setion Talk to Us, select menu item For Technical Help. 
    Technical Help. A drop down detail opens to  inform students that the mobile app requires 24 hours to update any new student information from the main student record in eConnect. If problem or concern exists longer than 24 hours, contact technical support for assistance. 
     
  13. For Ideas and Suggestions. Students may submit feedback about the mobile app directly to the Dallas College Student Navigate App Team. Selecting Give Feedback will create a pop-up feedback box. Students typing feedback then selecting SendFeedback will send feedback to an unmoderated mailbox.
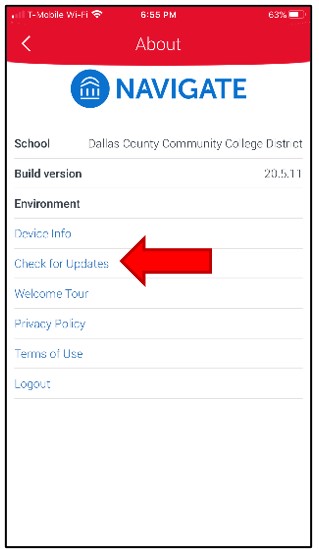
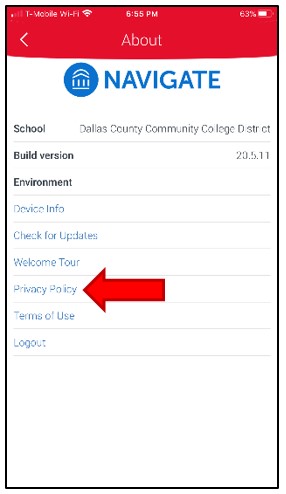
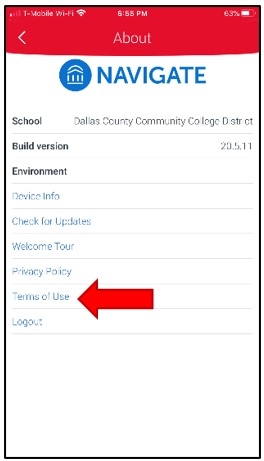
  14. Settings. Under section titled  
    Information and Suggestions. Select drop down menu item  
     

    Information and Suggestions. Select drop down menu item For Ideas and Suggestions to access the Give Feedback button. This button will generate an email to the Navigate Support Team.

  15. About. About provides additional technical and legal information about the mobile app. Under the section General, select About. Notice the app user’s school is verified here, along with the App build version. The Environment section contains links to technical and legal information, along with a link to log out of the app.
    Settings. Under section  
    Settings, About. Verify school selected for this app user and the app build version. There are six additional menu item options to select for additional information. ​​​​​​


    ​​​

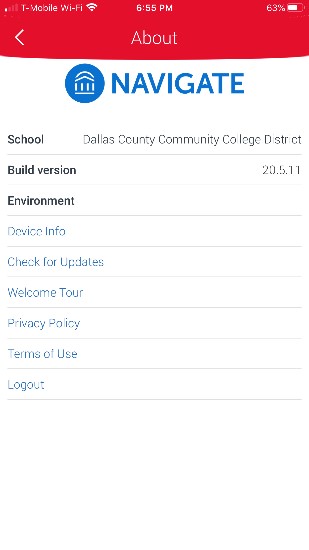
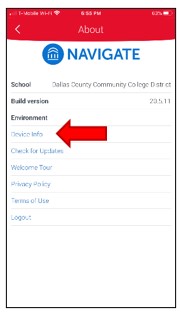
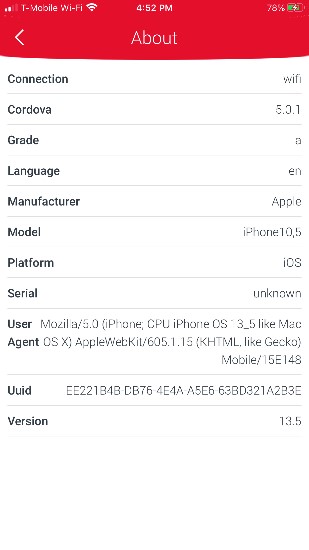
    • ​​​Device Info. On the About screen, select Device Info to access technical specifications of the device and app.​​
      About screen. Under Environment section, select  
      Device info page showing technical specifications.  
       
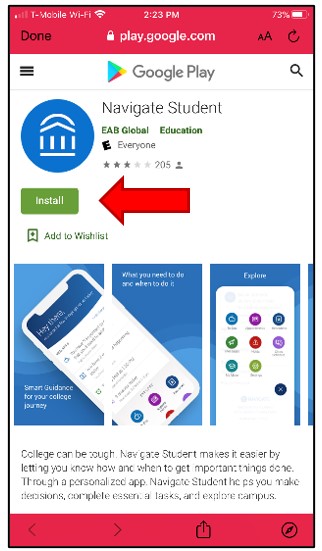
    • Check for Updates. On the About screen, select Check for Updates to access the Google Play store, and verify if there are any new Student Navigate app updates.
      About screen. Under Environment section, select  
      Google Play Store showing a description of the Navigate Student App. Select Install to install on mobile device.  
       
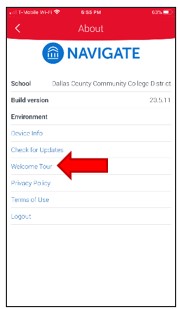
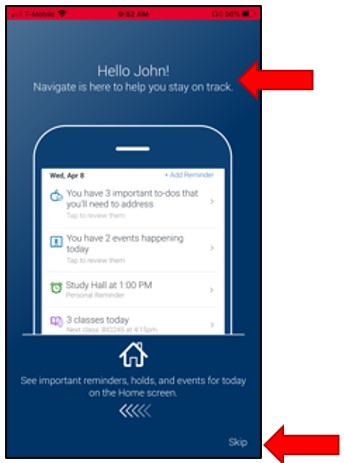
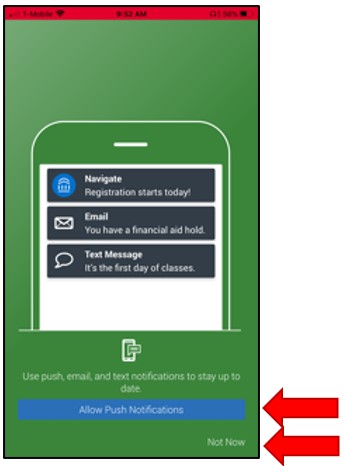
    • Welcome Tour. Under the Environment section, students may repeat the Welcome Tour that was originally completed during the initial student user account activation steps. The Welcome Tour consists of three screens:
      • A Greeting Screen
      • A screen to opt-in for or skip Push Notifications
      • A screen to opt-in for or skip other Notifications (alerts, sounds, etc.)
        About screen. Under Environment section, select  
        Welcome Tour. Greeting screen.  
         
        Welcome Tour. Choose Push Notifications for email and Text Messages Prompt.  
        Welcome Tour. Choose Notifications option for alerts, sounds and icon badges prompt.

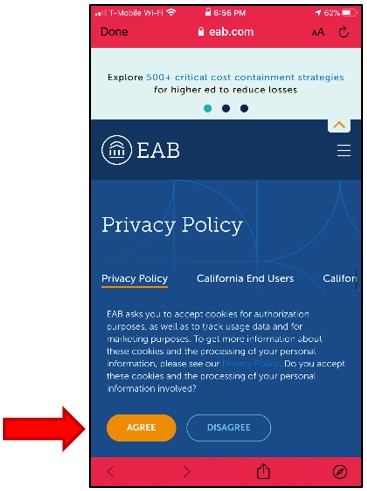
      • Privacy Policy. Under the section Environment, Select Privacy Policy. Review the Privacy Policy (legal liability limitations, etc.) that students accept by choosing to use the mobile app. There are two selection options: Agree or Disagree.
        About screen. Under Environment section, select  
        Student Navigate Mobile App explaining the Privacy Policy (legal liability limitations, etc.) students agree to by choosing to use the app. Select Agree or Disagree.  
         
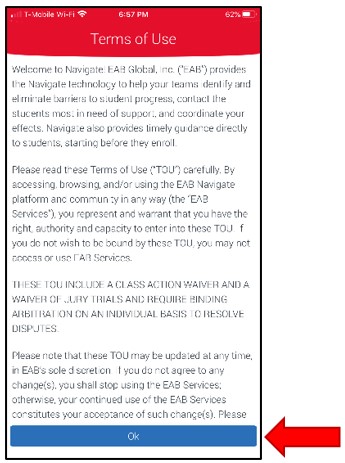
      • Terms of Use. Under the Environment section, select Terms of Use to read the Terms of Use (legal liability limitations, etc.) that students agree to by choosing to use the app.
        About screen. Under Environment section, select  
        Student Navigate Mobile App shows several paragraphs explaining the Terms of Use (legal liability limitations, etc.) students agree to by choosing to use the app. Select OK to accept.  
         
      • ​Logout. Under the section Environment, selecting Logout will log out the user from the Student Navigate App.​
        About screen. Under Environment section, select
        Loading Login Page Redirect will automatically flash, there are not steps available on this screen. 

        App Sign-in Prompt. Type official school email then select Next to log into the  Student Navigate Mobile App.