Navigate Student Desktop App Quick Guide: Schedule an Appointment
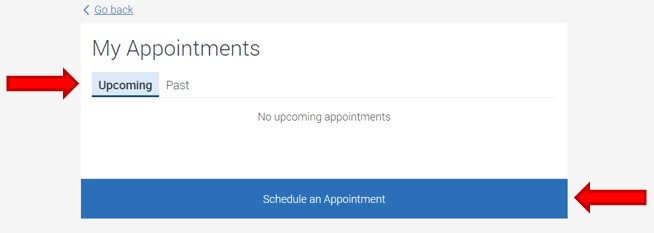
  1. ​​​Students now have a convenient way to schedule an appointment with academic advisors, student services, staff and faculty. In the list of tools on the left side of screen, ​a list of your currently scheduled appointments will be viewable on this section. From the Navigate links, select Appointments to start scheduling an appointment. The default appointment screen is set to Upcoming appointments.

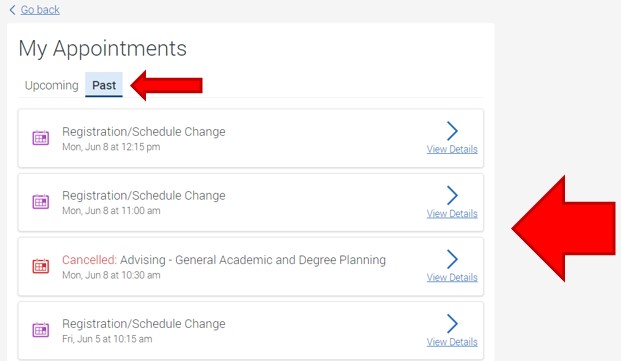
  2. To review appointments from the past, select the My Appointments - Past tab. Click the Past tab to review previous scheduled appointments. This information will show appointments that were completed and appointments that were cancelled.

  3. To schedule a new appointment, select the Upcoming tab, then select Schedule an Appointment. ​Select the Upcoming tab to return to the appointment scheduling screen. Click the button Schedule an Appointment to continue.

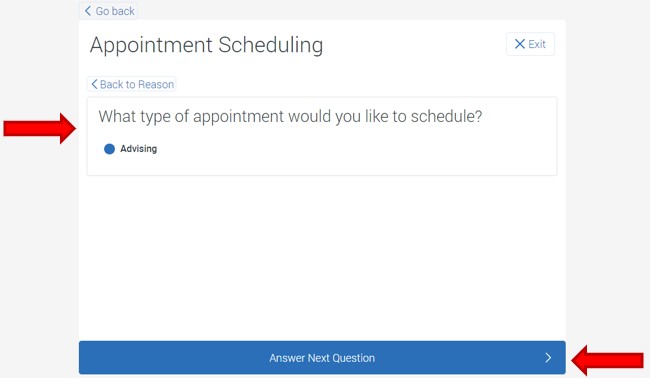
  4. Choose the Type of Appointment, then choose Answer Next Question to continue. ​The appointment type screen will appear.  At the time of this training manual creation, only Advising appointment types are available to schedule. Click the button Answer Next Question to continue.

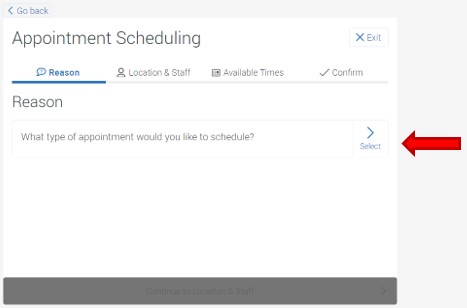
  5. To choose the Appointment Reason, click SelectThe appointment reason screen will appear. Click the link Select to continue.


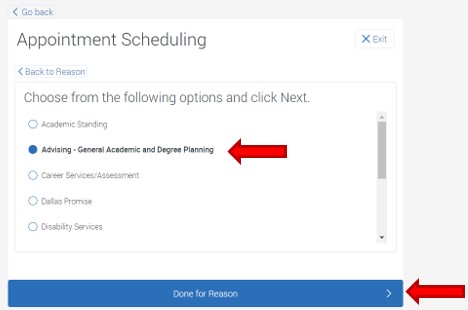
  6. Review the list of appointment options, then select the correct one by clicking the circle to the left of the appointment Reason. At the bottom of the screen, click Done for Reason. Notice for this example, the Reason selected is Advising – General Academic and Degree Planning
    The list of appointment reasons will appear. Choose a reason by clicking the circle to the left of each reason. This example shows the selected reason  Advising - General academic and degree planning. Click the button Done for reason to continue.

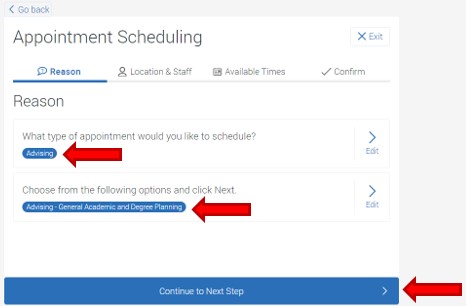
  7. Confirm the appointment Type and Reason are correct, then at the bottom of the screen click Continue to Next Step. ​
    The Appointment type and reason confirmation screen will appear. Review the selections. To continue, click the button Continue to next step.

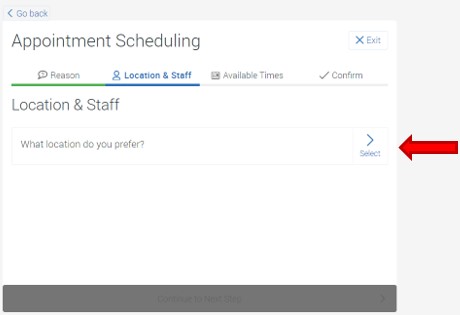
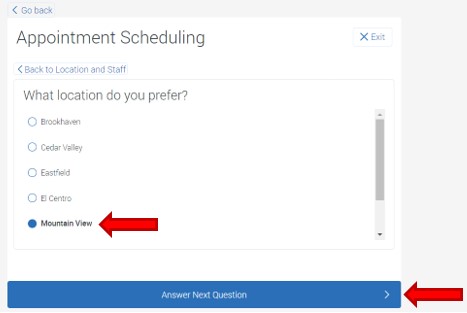
  8. Choose the campus location for this appointment by clicking Select. ​Appointment Location question prompt What location do you prefer? To continue, click the link Select.

  9. Review the list of campus locations, then select the correct one by clicking the circle to the left of the campus location. At the bottom of the screen, click Answer Next Question. Notice for this example, Mountain View campus is selected. ​​​The list of appointment locations will appear. Choose the location by clicking the circle to the left of each reason. This example shows the selected location  Mountain View. To continue, click the button Answer next question.

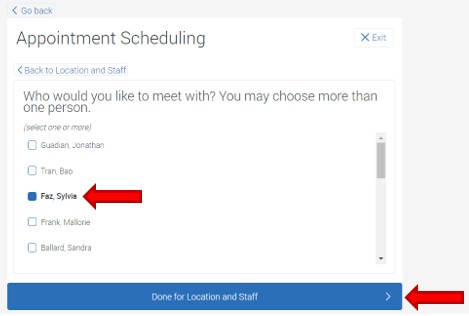
  10. Review the list of advisor names and choose the name of your advisor by clicking the circle to the left of the advisor name. Despite the instructions stating “(select one or more),” students may only schedule one appointment with one advisor at a time. Select Done for Location and Staff. ​
    The list of academic advisors will now appear. Choose an advisor by clicking the box to the left the advisor name. Advisor names are listed last name, comma, first name. This example shows the selected advisor Faz, Sylvia. To continue, click the button Done for location and staff to continue.

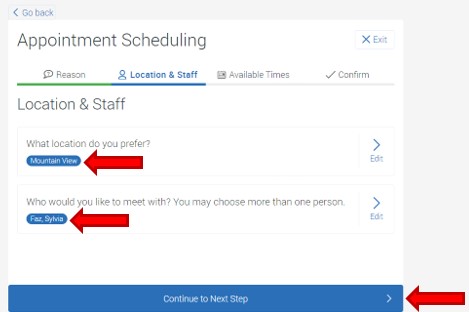
  11. Confirm the campus location and advisor are correct, then at the bottom of the screen click Continue to Next Step
    The appointment location and staff confirmation screen will appear. Review the selections. To continue, click the button Continue to next step.

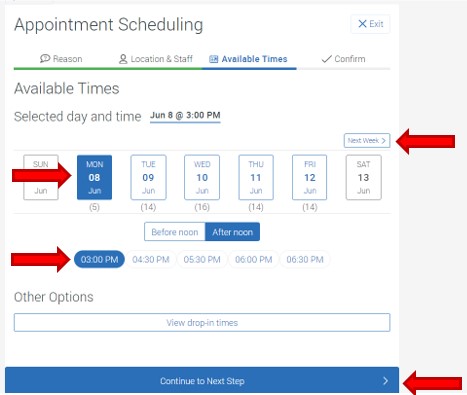
  12. Choose your preferred appointment day and time. Notice there is an option to advance forward to the next week by selecting Next Week > right above the day Saturday. Click Continue to Next Step
    Select from the available appointment days and times. The first available day and times are shown. The Next Week link is available to advance one week into the future. In this example, options selected are: Monday June 8, Afternoon Appointment times, 3:00 PM. To continue, click the button Continue to next step.

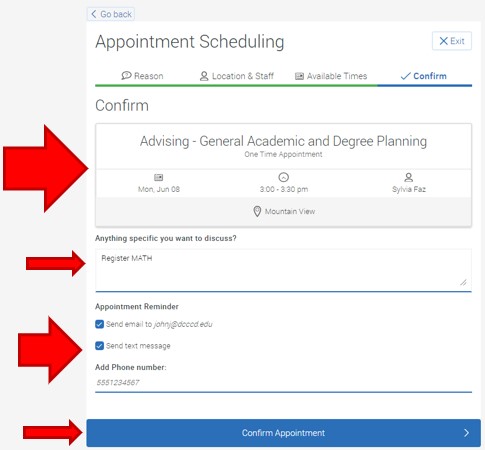
  13. The appointment confirmation screen is next. This screen will show confirmation of the appointment details. 
    • ​Below the appointment details, under the question Anything specific you want to discuss? there is a textbox for the student to type comments or questions to tell the advisor.
    • Below the comments section there is an option to opt in for email and text message Appointment Reminders, along with an option to type the students’ preferred phone number in case the advisor needs to call the student by phone.
    • Select Confirm Appointment to complete the scheduling steps and accept the appointment.
    The final appointment confirmation screen. View the appointment date, time advisor and location. If needed, type comments to the advisor in the textbox Anything specific you want to discuss? (this example states Register MATH). Appointment reminders (email and text) are available by checking the checkbox to the left of each options. To complete and schedule this appointment click the button Confirm Appointment.