Navigate Student Desktop App Quick Guide: To-Dos and Events
1. Students may review important college reminders and even create personal reminders on the To Dos and Events List. To-Dos are reminders about important tasks students should complete. Events are important Calendar Dates students should know and understand.
2. Please select To-Dos and Events from the menu list. Notice in this example (screenshot below), Under the section Today there is an Event showing the 4th Class Day (Certification Date) for Summer Session 5-week-1 (June 6). Also notice in the Upcoming section there is a To-Do suggestion to Review your “major” quiz (June 25).
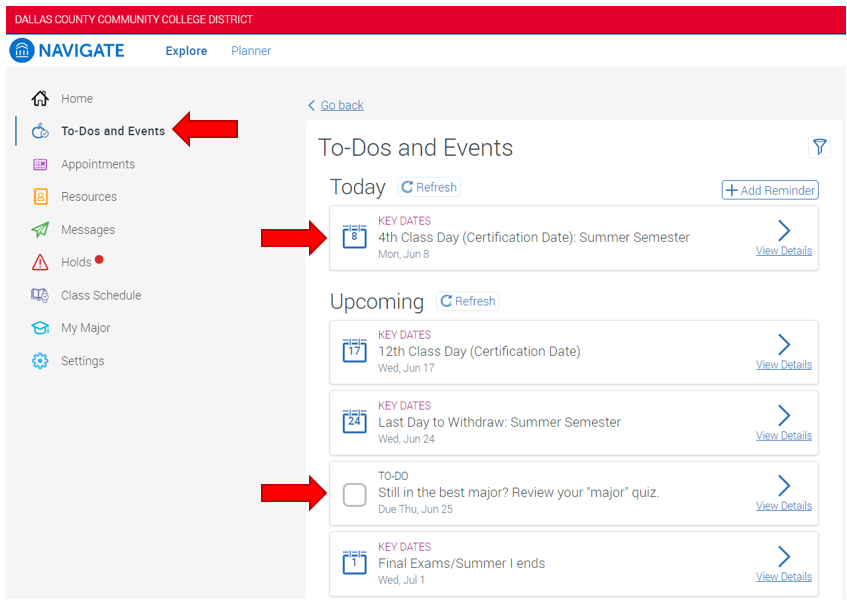
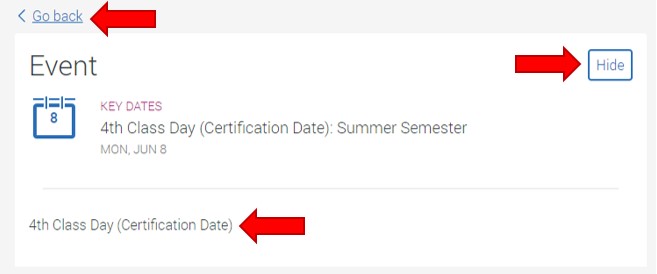
3. Under section titled Today, for item “4th Class Day (Certification Date)” select ViewDetails.

4. Notice there is a brief description for this event. To remove this item from your To-Dos and Events list, select Hide. To return to the To-Dos List, select Go Back.
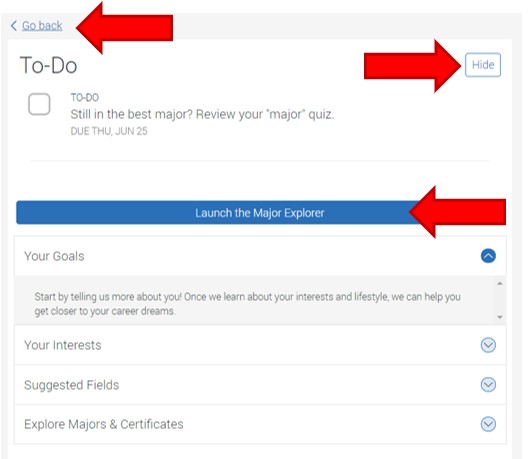
5. Under the section Upcoming for the To-Do item, “Still in the best major? Review your 'major'" quiz, select View Details.

6. The detail view shows a button to “Launch the Major Explorer” and explanation of each major quiz section.
- In the top left corner of this section, click Go Back to leave this To-Dos viewable on the To-Dos and Events list, and return to the list.
- In the top right corner of this section, click Hide to remove this To-Do from the To-Dos and Events list without completing it, and return to the list.
- Near the title of the To-Do, select the checkbox to complete this To-Do, remove it from the To-Dos and Events list. Click Go back to return to the list.
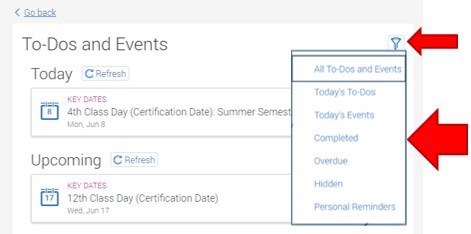
7. In the top right corner of the To Dos and Events section there is an option to filter item in this list. The seven filter options include:
- All To-Dos and Events
- Today’s To-Dos
- Today’s Events
- Completed
- Overdue
- Hidden
- Personal Reminders
8. At the bottom of the To-Dos and Events section there is a section named Tips, providing students quick access to additional resources for assistance. To open resources, select View Details.
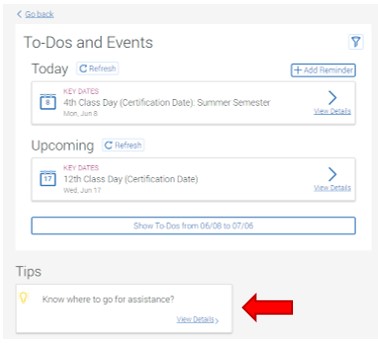
9. A pop-up box opens showing a list of the Virtual Student Resources. In the top right corner of this pop-out box, select Dismiss to return to the previous page.

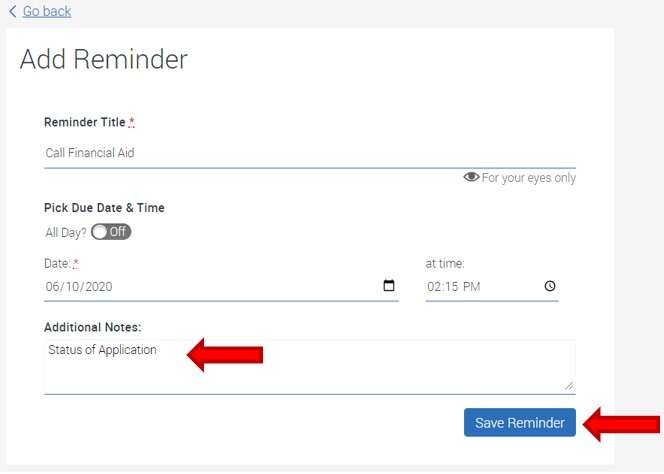
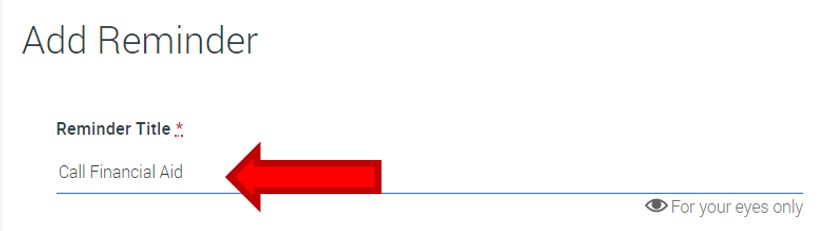
10. Add reminder. Students have the option to add a personal reminder on the To Dos and Events list. Near the top right corner, below the Filter item, select +Add Reminder to add a personal reminder. From top to bottom, the parts of the reminder include:
- Reminder Title. Type a brief title for the reminder (first screenshot below). Select the drop-down menu to choose the date and time for this reminder.
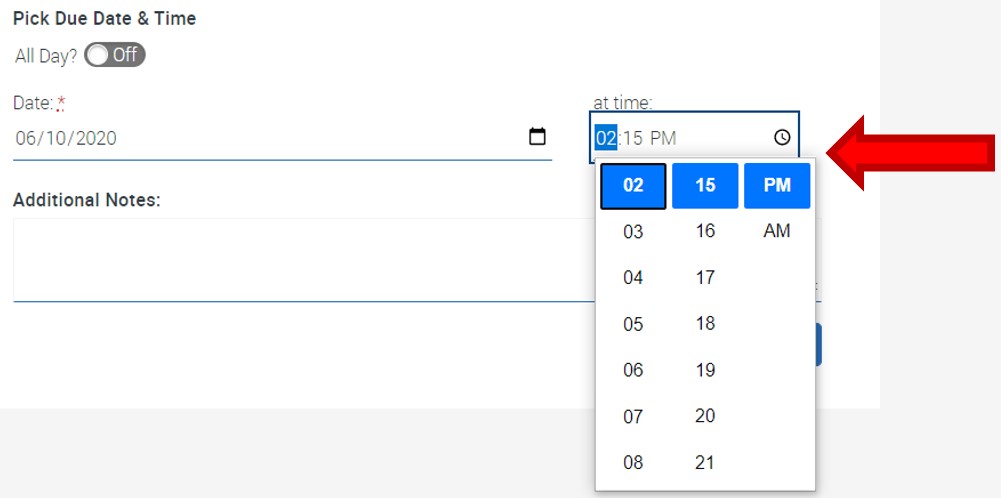
- Pick Date. A new screen shows the options for selecting the appointment date and time. Notice there is an option to set the appointment reminder for All Day. The next row containing dates for the current week has an option at the end of the row to progress advance forward one week.
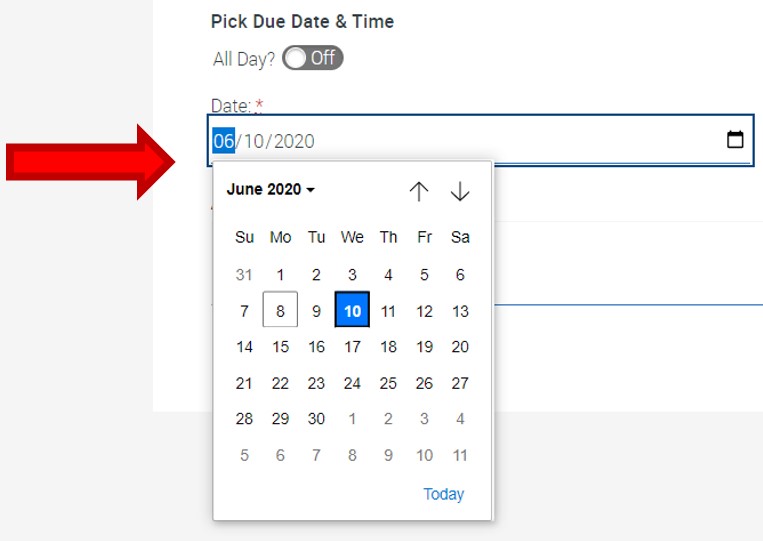
- Pick Time. Below the row containing dates is the list of available appointment start times. Once the date and time are selected, choose OK at the bottom of this screen.
- Additional Notes. This text box allows for more a detailed description for this reminder. Select Save Reminder to complete it.