Navigate Student Mobile App Quick Guide: Schedule an Appointment
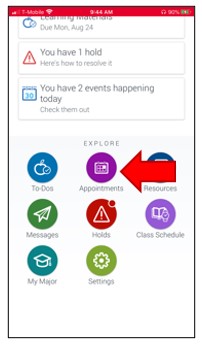
  1. ​Students now have a convenient way to schedule an appointment with academic advisors, student services staff and faculty. Notice Appointment under the Explore menu list.
    Mobile app home page. Under the section Explore, select menu item, To Dos.
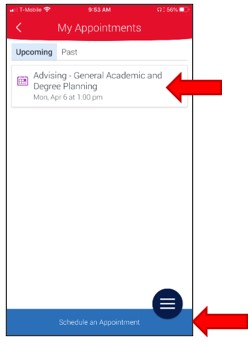
  2. A list of your currently scheduled appointments will be viewable starting at the top of this screen. At the bottom of this screen, please select Schedule an Appointment.
    Appointment Scheduling. My Appointments screen showing Upcoming Appointments menu item tab selected. Past Appointments menu item tab available for review. Select menu item Schedule an Appointment to continue.
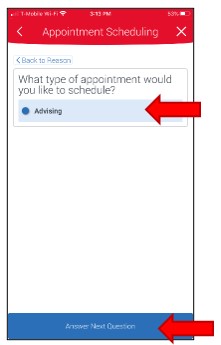
  3. Choose the Type of Appointment. At the bottom of the screen, choose Answer Next Question.
    Appointment Scheduling. Start screen. Choose menu item Select to continue. 
    Appointment Scheduling. Type of Appointment with Advising selected. Choose menu item Answer Next Question to continue. 
     
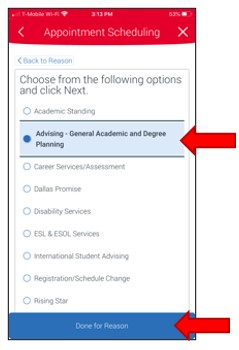
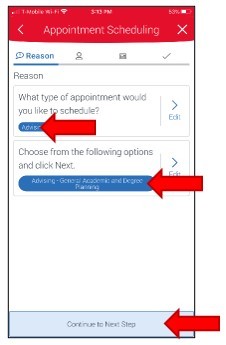
  4. Choose the Appointment Reason. Review the updated information and at the bottom of the screen select Continue to Next Step.
    Appointment reason prompt showing Advising - General Academic and Degree Planning selected. Choose menu item Done for Reason to continue. 
    Appointment edit screen showing appointment Reason and topic previously selected. Select menu item Continue to Next Step to continue. 
     
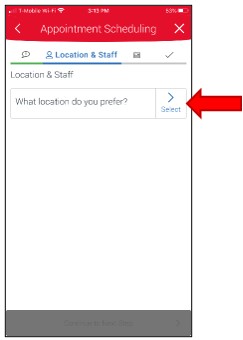
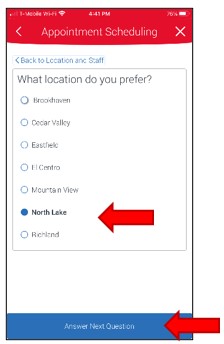
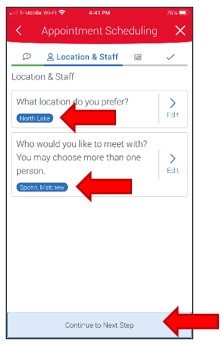
  5. Choose Location for appointment. Notice Location = North Lake. At the bottom of the screen select Answer Next Question.
    Appointment Scheduling Choose location start screen. Choose menu item Select to continue. 
    Appointment Scheduling, Select Location Screen showing a list of the seven college campuses with North Lake selected. Choose menu item Answer Next Question to continue. 
     
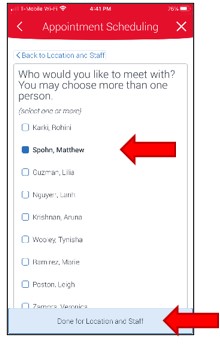
  6. Choose Advisor. Please scroll down the screen and select the name of your assigned advisor. Despite the instructions stating (select one or more), students may only schedule an appointment with one advisor at a time. At the bottom of the screen, select Done for Location and Staff. Next, review the updated information and at the bottom of the screen select Continue to Next Step.
    Appointment Scheduling. Select advisor showing list of advisors available for selection. Advisor names are not in alphabetical order. For this example, Matthew Spohn has been selected. Select menu item Done for Location and Staff to continue. 
    Appointment Scheduling. Location & Staff edit screen. Review location and advisor for accuracy, then select menu item Continue to Next Step to continue. 
     
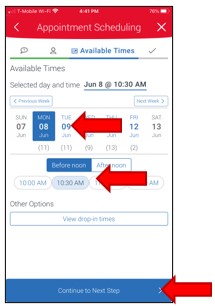
  7. Choose your preferred appointment day and time. Then select Continue to Next Step.
    Appointment Scheduling. Date selected is Monday June 8. Time selected is 10:30 AM. Select Continue to Next Step to continue.
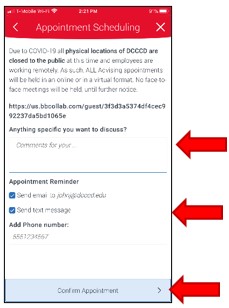
  8. The appointment confirmation screen is next. This screen will show confirmation of the appointment details, including additional instructions for the student to prepare for the appointment, such as location of appointment and items to bring to the appointment.

    Scroll down to the section Appointment Reminder, to select your preferred reminder option (email and/or text). To add comments for the advisor, to select appointment reminder preferences and add an optional phone number. Select Confirm Appointment to complete the scheduling process.

    Appointment Scheduling. Confirm Appointment Screen, showing details of the scheduled appointment (advisor name, appointment date, time) and additional details explaining the appointment in this example will be completed online using BlackBoard Collaborate Ultra, the URL for the appointment is provided. Scroll down to continue (see next image). 
    Appointment Scheduling. Confirmation page, showing option for student to type comments for the advisor (student concerns or requests) and the ability to opt-in for an email and/or text reminder. Select Confirm Appointment to finalized appointment. 
     
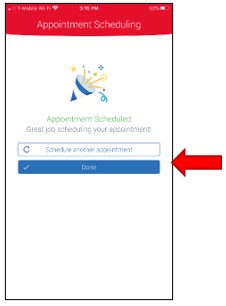
  9. Select your preferred calendar option to add an appointment reminder. You should receive a confirmation screen with the option to schedule another appointment or exit the scheduling tool and return to the app home screen.
    Add To Calendar pop-up menu showing options available on this device to create an appointment reminder. 
    Appointment Scheduling. Final screen with an option to Schedule Another Appointment and an option Done, to exit the appointment scheduling tool and return to the app home screen